If you have an M1, M2, etc. Apple machine, select ARM64 [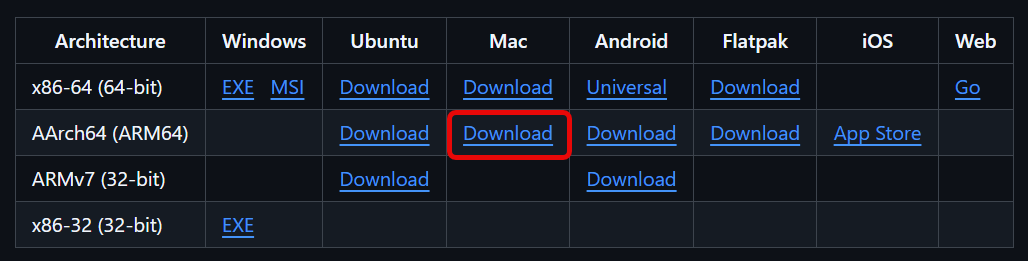](https://wiki.revivenovi.org/uploads/images/gallery/2026-01/9nnimage.png)
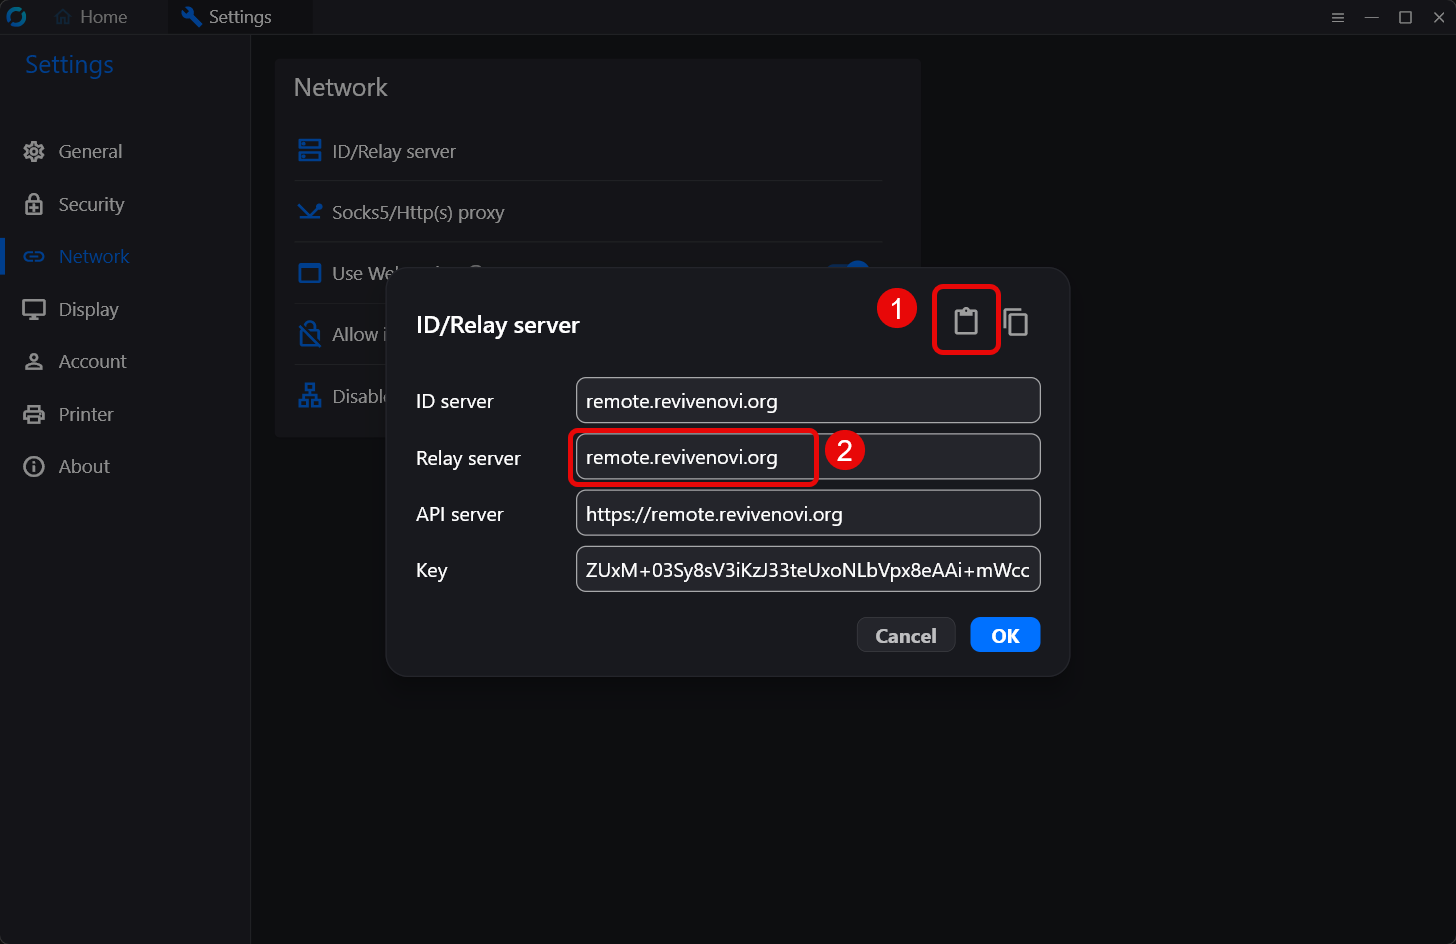
### Step 2 Once downloaded, install the application. ### Step 3 Open the application. You'll be greeted by the interface. On the left-hand side, you'll see some prompts to allow permissions for certain features for the software. Go ahead and go though the prompts to accept them, allowing the software the permissions needed for remote desktop. You're interface should look like this when all permissions have been fixed: [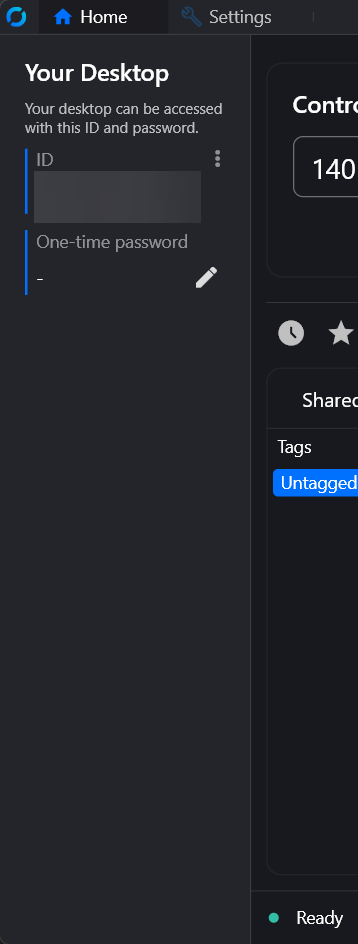](https://wiki.revivenovi.org/uploads/images/gallery/2026-01/6sHimage.png) ### Step 4 In order to log into you created, you'll first need to configure the network settings. This will only be done once, so don't worry about the complexity. Navigate to the hamburger menu in the top right corner. [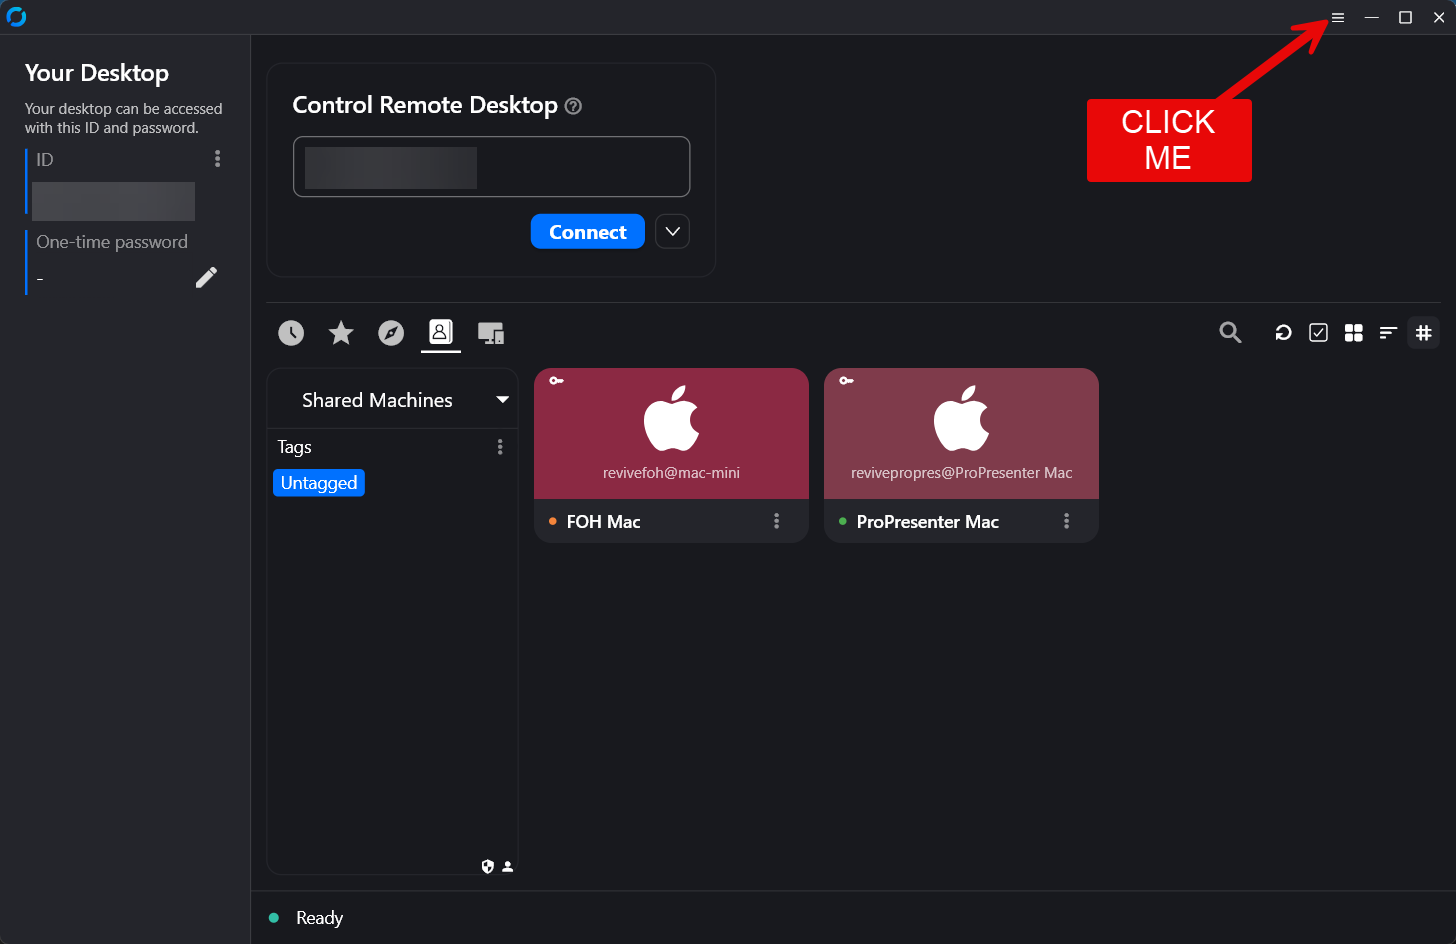](https://wiki.revivenovi.org/uploads/images/gallery/2026-01/gKximage.png) ### Step 5 Navigate to the Network tab on the left-hand side, then unlock the settings by typing in your computer password [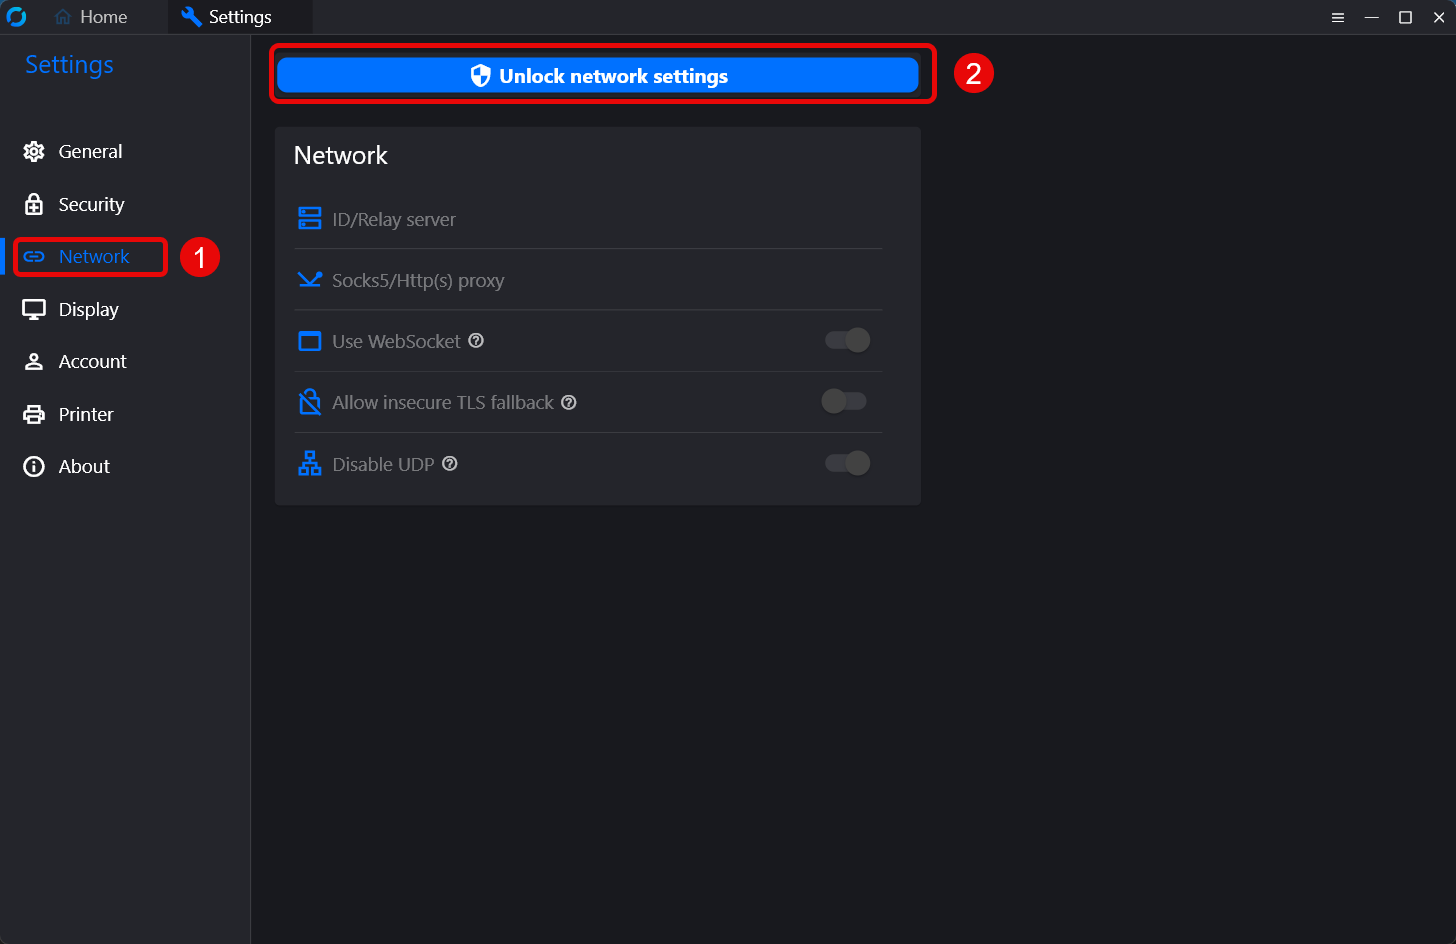](https://wiki.revivenovi.org/uploads/images/gallery/2026-01/H64image.png) ### Step 6 Go ahead and toggle the *Use Websocket*, then navigate to the ID/Relay server section. [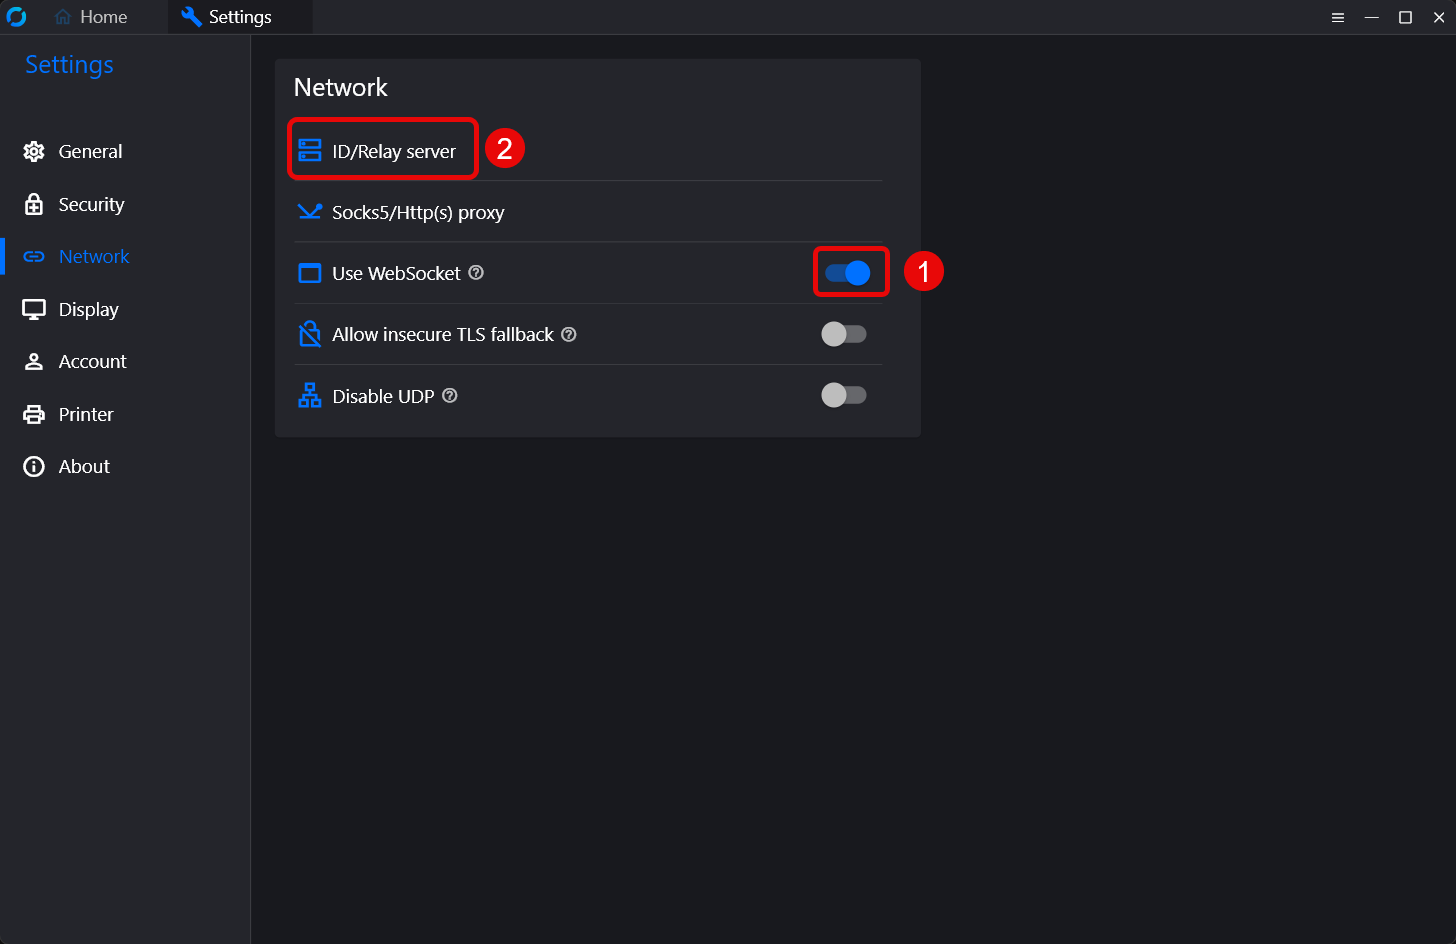](https://wiki.revivenovi.org/uploads/images/gallery/2026-01/Saeimage.png) ### Step 7 Next, copy the string of characters below. Go ahead and click on the clipboard symbol on the top rand-hand corner. This feature will automatically configure your machine. Once the information has been added, fill in the relay section by copying the information from the ID server section. They should match. Then click OK.9JyZy9mLpZ3buVmdpZXZy5SZ09WblJ3LvozcwRHdoJiOikGchJCLi0TUOx2YjdVbrkWQBVGO4BnVixkTvhXVlR3MzokeLl2MWNHO5N1MwsST4VlWiojI5V2aiwiInJ3bukmdv5WZ2lmdlJnLlR3btVmciojI0N3boJye
[](https://wiki.revivenovi.org/uploads/images/gallery/2026-01/MFpimage.png) ### Step 8 Click the Home tab at the top of the window to go back to the main window. Then tab over to the login page at the bottom. Click login and you'll be prompted to log again, using Authentik. [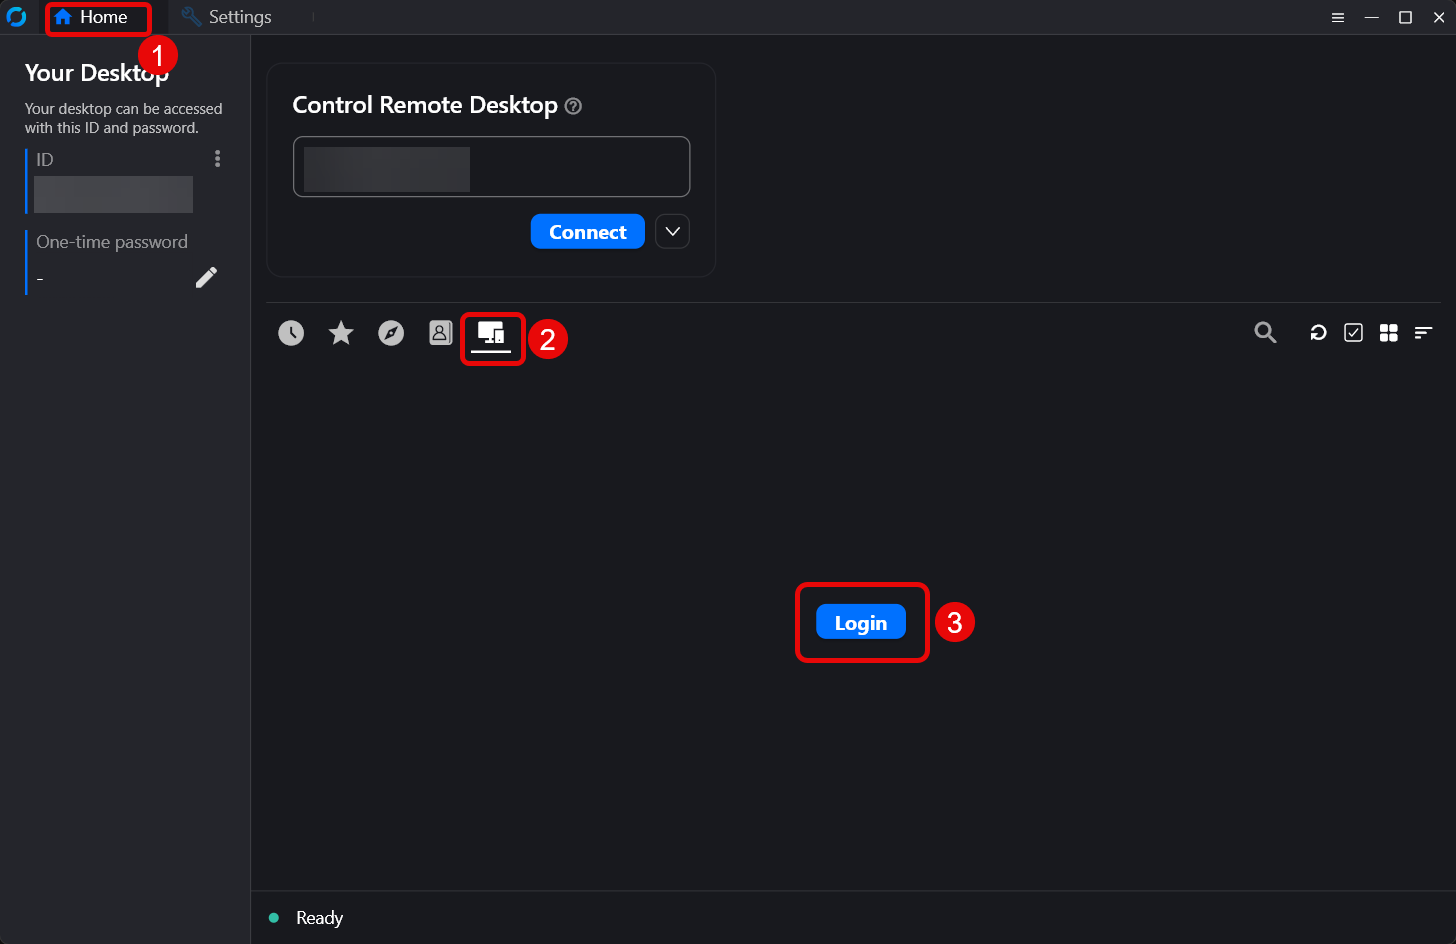](https://wiki.revivenovi.org/uploads/images/gallery/2026-01/h9Timage.png) ### Step 9 Once logged in, go back to the desktop software and click on the Address book. Inside the window, pull down the section where your address book is and select Shared Machines. If you've been given permission, you should see the machines there, ready for you to use. [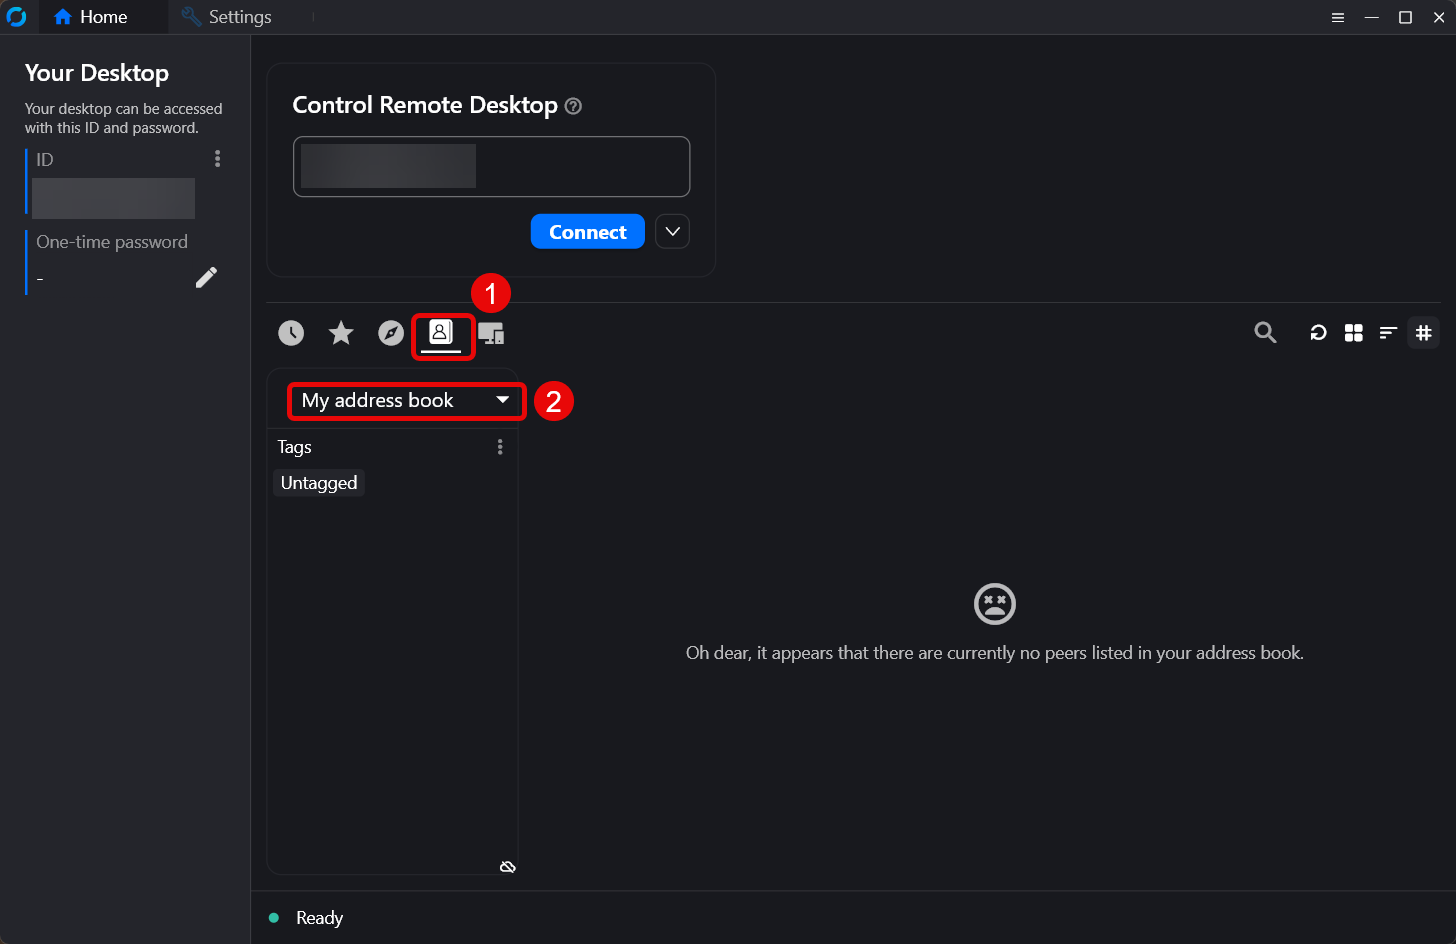](https://wiki.revivenovi.org/uploads/images/gallery/2026-01/d4kimage.png) ### Step 10 Click the 3 dot menu, select Connect and you should be good to go! Enjoy! [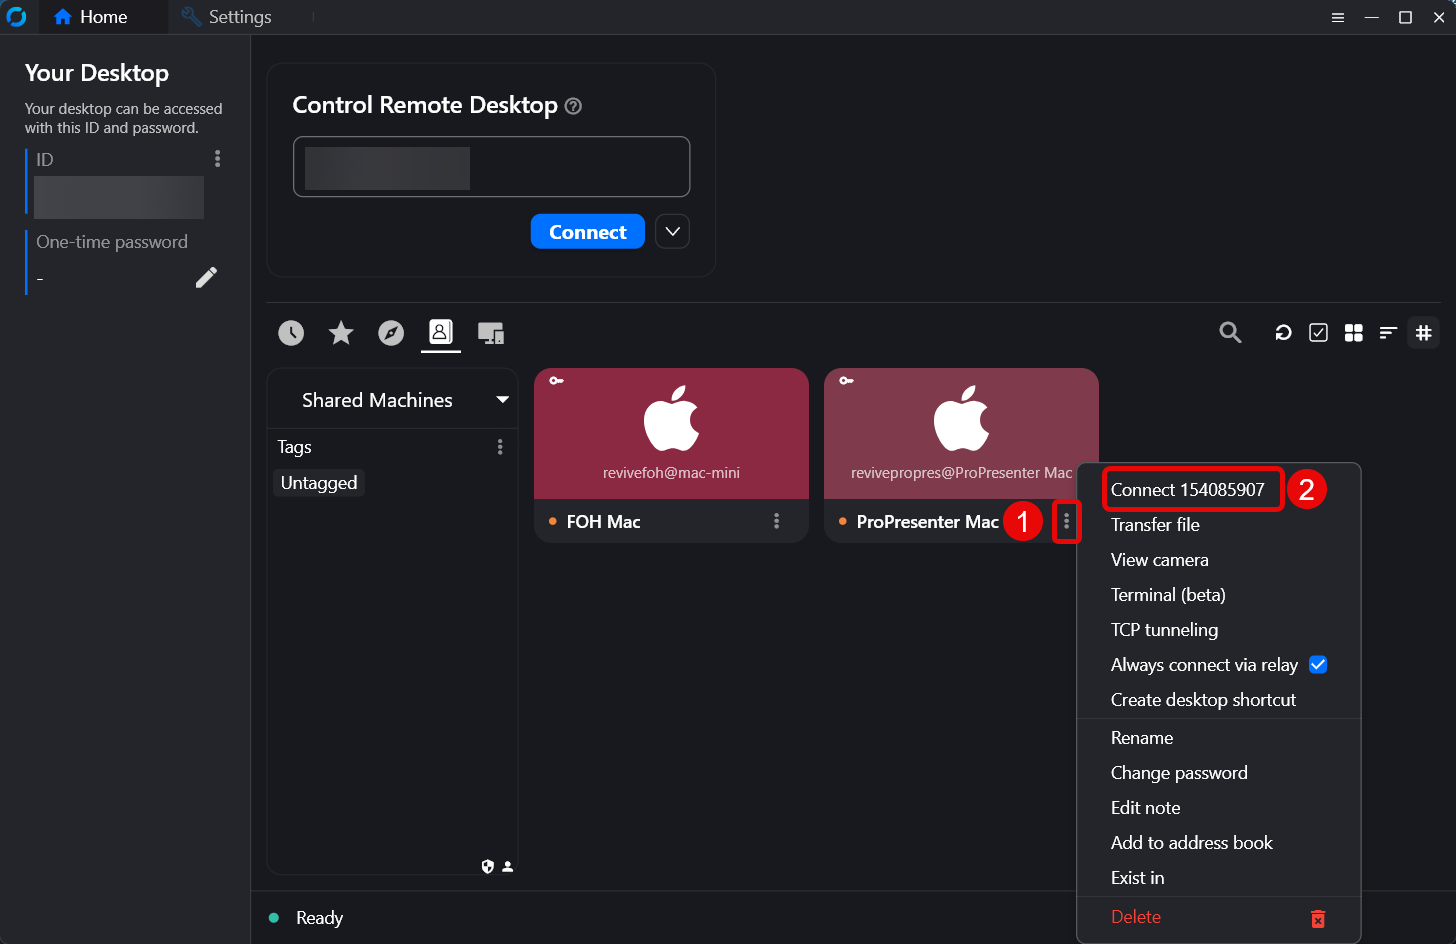](https://wiki.revivenovi.org/uploads/images/gallery/2026-01/0uGimage.png)